Sunday, February 15, 2009

Sew along for binding in the flat...

Here's a tutorial for how to do binding in the flat.


Here my tank top front and back pieces with one shoulder seam sewn together. (when you're sewing in the flat you only sew one seam together before attaching the binding)

Before sewing one the binding I adjust my stitch width on my serger to the widest setting.


Take your binding strip and lay it right sides together on top of the neckline for the shirt.
I leave my binding strip overlapping a little bit so that it's easier for my coverstitch machine to grab it later on.

Start serging it on, gently stretching the binding as you sew.

Here it is once it's all serged on.

Turn the binding strip over so that it's now covering the threads.

And turn it down once more so that it's now looped to the inside of the shirt.

Now coverstitch (or top stitch however you normally do) the binding in place.

Now take your other shoulder seam and serge it together.

Stitch that seam down, I always do it so that the seam in pointing towards the back of the shirt.

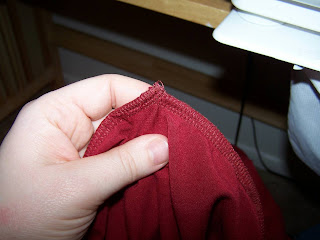
Here's what it looks like once it's stitched down.

And here's what it looks like when you're done.
(Obviously the whole shirt isn't done, but the neck binding is.)
If you're binding the arms (like I will be because this is a tank top) then apply the binding to the arm holes now, coverstitch it down, and serge up the side seams.


Friday, February 13, 2009

A tutorial for a V-neck shirt

***Update: I've posted a newer version of a v-neck shirt here***

Hopefully this is helpful to someone. My sister asked me to show her how to do a v-neck and I thought I'd go ahead and post it here. This may not be the best or easiest way for everyone, but it's the way I do it, and I love the results.

First thing I do is cut my neckband and iron it in half lengthwise.
Then overlap the ends to form your "v" shape.


I then sew the edges down, so I don't have to worry about them shifting while I'm actually sewing this piece onto the shirt.

Here is the stitching.

I then trim off the excess fabric from the corners.

Here is the front of the shirt with the band right under it. The angles are completely the opposite, so you'll have to pin this together to keep everything in place.

Here is mine pinned in place.

And here's what it looks like form the opposite side.

Then I serge the band in place.

Stopping when I get to the corner and turning it.

A picture of what it looks like on the inside once the band in serged on.

Then you flip it and topstitch it.

Here's the final product.