Hopefully this all makes sense, and helps you make this outfit.
Cut out all pieces, and mark snap placements according to pattern.
There are 2 different front pieces for this pattern. Both are pictured here, though a little backwards, because the one on the right side, with the crotch seam (which I'll call pattern piece "B"), will actually be on the left side and overlap the other piece, without the crotch seam(which I'll call pattern piece "A").
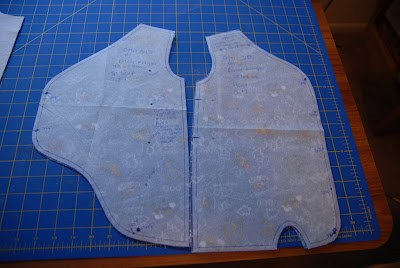
This piece is the one that was on the right in the upper picture (piece B), the one with the crotch seam. Make sure that you remember NOT to sew this shoulder seam until AFTER you're done binding. I learned the hard way the first time I made this, so I wrote it on the pattern, and I also mark this shoulder with a pin so I can't sew it. :)

Sew the back pieces together.

Sew the shoulder seam of pattern piece A (the one without the crotch seam) to the back.

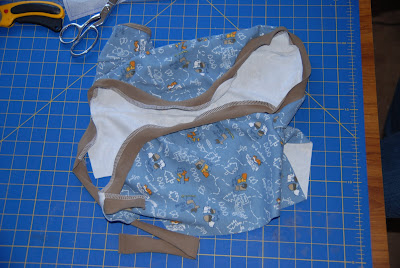
Sew on the sleeve.
*I had already done the binding on both sleeves*

Line up crotch pieces of pattern piece B and back.

Sew together.

Now, sew the side seam closed on the side that you've attached the sleeve to.

Starting at the shoulder on pattern piece B that you haven't sewn together, apply binding to right side of fabric, and go all the way around until you get the shoulder on the back of the outfit.
Fold binding over and topstitch down.
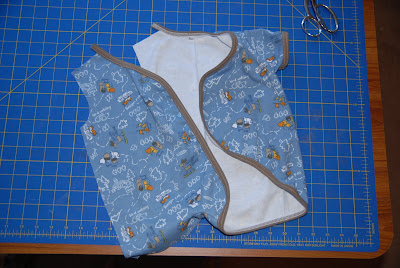
Sew together that shoulder seam now, then sew on sleeve and bind the other leg. Then sew the side seam. (my picture doesn't show the side seam sewn, because I forgot to take a pic of that step)

Now I take 3/4" twill, tape fold it in half, then half again, so it's now 4 layers thick. I sew on a piece to the wrong side of the fabric at each spot where the snaps will go on pattern piece A. This way I won't tear the fabric when unsnapping.
I also use twill tape that I sew onto the seam allowance, as shown, so that I can apply snaps to the inside of outfit and don't have to use ties as the pattern originally calls for. Just make sure that the twill tape sticks out enough so that you can apply a snap to it.
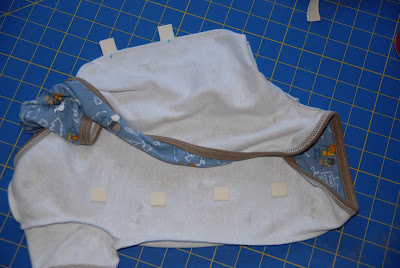
Here's what it looks like on the inside with the snaps.

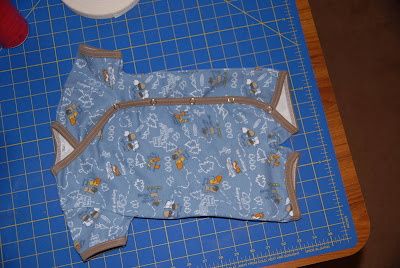
And here's the outside, all finished up.
 Then I'm a little early with the baby outfits, since we don't have a baby on the way yet. Hopefully we'll be expecting again by the end of the year. For some reason I have the assumption that we'll have another boy. I have 16 outfits made so far, and 14 of them are for a baby boy.


